How does visual inspection work?
What if the most powerful quality control tool is one we’ve used for centuries? Despite the rise of advanced technology, this fundamental method remains indispensable across countless industries.
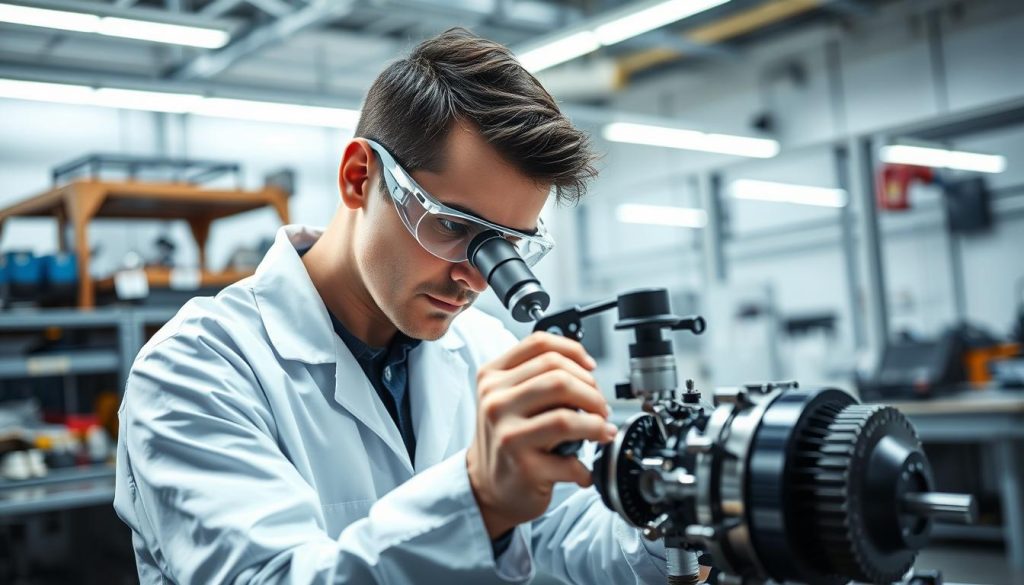
Visual inspection represents the cornerstone of quality assurance and safety protocols. It involves the careful examination of equipment, products, and materials using the human eye, often aided by simple tools. This process effectively identifies surface-level defects like cracks, corrosion, and porosity.

As a form of nondestructive testing, this methodology allows for immediate assessment without altering the items being examined. Its adaptability makes it crucial in manufacturing, energy, and medical fields. The approach has evolved significantly, now incorporating automated systems powered by artificial intelligence.
We will explore the complete spectrum of these techniques, from basic manual checks to sophisticated automated solutions. Understanding this evolution is key to implementing effective quality control measures that protect both workers and consumers.
Key Takeaways
- Visual inspection is a fundamental, non-destructive method for assessing quality and safety.
- It serves as a first line of defense in identifying surface defects across various industries.
- The technique has evolved from manual examination to include advanced automated systems.
- It provides immediate, cost-effective assessment without damaging materials.
- Modern approaches combine traditional principles with AI and computer vision technologies.
- Effective implementation leads to measurable improvements in operational efficiency.
- This method remains critical for maintaining product integrity and compliance standards.
Understanding Visual Inspection Concepts
Visual assessment methodologies form the bedrock of industrial quality management systems. We define this approach as a systematic process where trained professionals or technological systems examine equipment, products, and surfaces for deviations from established standards. This foundational practice identifies critical issues like cracks, corrosion, and contamination before they escalate.
Definition and Key Benefits
The primary advantage of visual assessment lies in its immediate feedback capability. Inspectors can identify surface defects in real-time, enabling rapid quality control decisions. This non-destructive testing method preserves material integrity while providing cost-effective evaluation.
Significant benefits extend beyond basic defect detection. Organizations achieve substantial cost savings through early problem identification. Worker safety improves when remote inspection methods replace hazardous environment exposure. Automated systems enhance accuracy by detecting imperfections invisible to human observers.
Historical Perspective from Manual Checks to Modern Methods
Traditional inspection relied solely on human expertise with basic magnification tools. Craftsmen developed keen observational skills through years of experience. Standardized protocols later emerged to ensure consistent evaluation across industries.
Today’s methods integrate digital imaging, drones, and artificial intelligence. These technologies maintain inspection fundamentals while eliminating human fatigue factors. Modern systems process thousands of images hourly with unwavering consistency, representing the evolution from purely manual examination to technologically augmented assessment.
How Does Visual Inspection Work?
The operational framework for surface examination follows a deliberate sequence that ensures comprehensive coverage. We implement this systematic approach across all quality control operations to maintain consistent standards.
Step-by-Step Process Overview
Our methodology begins with thorough preparation. This initial step involves cleaning all surfaces and establishing optimal lighting conditions. Proper preparation eliminates environmental factors that could obscure potential defects.
The observation phase represents the core assessment activity. Trained inspectors examine equipment and products using established protocols. They maintain specific viewing distances and angles to ensure accurate defect identification.
Documentation transforms observations into actionable data. Inspectors record detailed findings with supporting evidence. This information feeds directly into maintenance and quality systems.
| Process Phase | Key Activities | Primary Tools | Quality Outcomes |
|---|---|---|---|
| Preparation | Surface cleaning, lighting setup, tool assembly | Cleaning materials, lighting equipment, basic tools | Optimal examination conditions |
| Observation | Systematic scanning, defect identification, consistency checks | Magnifiers, measurement devices, inspection guides | Accurate issue detection |
| Documentation | Note-taking, photography, digital recording | Cameras, tablets, specialized software | Comprehensive data capture |
| Follow-up | Task assignment, re-inspection, trend analysis | Maintenance systems, scheduling tools, analytics | Effective corrective actions |
The final follow-up step ensures findings lead to resolution. We assign repair tasks based on defect severity and schedule verification checks. This completes the quality assurance cycle.
The Evolution from Manual to Automated Inspections
Over recent decades, the field of quality assessment has undergone a remarkable evolution from human-centric methods to technology-driven solutions. This transformation represents a fundamental shift in how organizations maintain quality standards and ensure operational safety.
Traditional Manual Techniques
For generations, skilled inspectors relied primarily on their naked eye and basic tools. They used flashlights, magnifying glasses, and measuring instruments to identify surface defects. The effectiveness of these manual processes depended heavily on individual expertise and attention to detail.
Integration of AI and Remote Technologies
Modern systems now incorporate artificial intelligence and computer vision capabilities. These advanced solutions can process thousands of images with consistent accuracy. Remote visual technologies enable examination of hazardous environments without risking personnel safety.
| Aspect | Manual Approach | Automated Systems | Key Improvement |
|---|---|---|---|
| Speed | Limited by human pace | High-speed processing | Faster defect detection |
| Consistency | Varies by inspector | Uniform standards | Reliable quality control |
| Data Collection | Basic documentation | Rich analytics | Better decision support |
| Safety | Direct exposure risks | Remote operation | Enhanced worker protection |
This technological progression enables manufacturers to achieve higher quality standards while reducing operational costs. The combination of human expertise and machine precision creates a powerful quality assurance framework.
Techniques and Tools in Visual Inspection
Modern quality assurance programs leverage a diverse toolkit of examination approaches and technologies. We categorize these methodologies based on coverage requirements, accessibility constraints, and defect detection capabilities.

Visual Testing Methods and Equipment
Sampling strategies range from random checks to comprehensive full manual assessment. Random sampling examines statistically selected products for batch quality verification. Full manual sampling ensures every unit meets strict compliance standards in critical applications.
Remote visual inspection (RVI) utilizes cameras, drones, and robotic systems to access hazardous or confined spaces. These technologies capture high-resolution imagery for real-time or later analysis. They provide enhanced safety while expanding examination capabilities across vast geographic areas.
Automated systems revolutionize high-volume manufacturing through continuous monitoring. Strategically positioned cameras capture images of every product moving through production lines. Sophisticated algorithms analyze each frame against quality standards with machine learning precision.
| Methodology | Primary Applications | Key Equipment | Operational Benefits |
|---|---|---|---|
| Random Sampling | Batch quality verification | Basic magnifiers, lighting | Cost-effective for large volumes |
| Full Manual Assessment | Critical component verification | Specialized mirrors, borescopes | Comprehensive defect identification |
| Remote Visual Inspection | Hazardous or inaccessible areas | Drones, robotic crawlers, cameras | Enhanced safety, expanded coverage |
| Automated Systems | High-speed manufacturing lines | Industrial cameras, AI processors | Real-time sorting, consistent accuracy |
Utilizing Cameras, Drones, and Advanced Sensors
The equipment spectrum spans from basic magnifying glasses to sophisticated imaging systems. Basic tools include illuminated magnifiers and measurement devices for component examination. Advanced systems incorporate stabilized cameras and specialized lighting for optimal defect visibility.
Selection requires analyzing specific application requirements including defect types and accessibility constraints. Optimal approaches often combine multiple complementary techniques. This integration ensures comprehensive assessment while validating system performance through periodic manual checks.
Quality Control, Safety, and Non-Destructive Testing
Accuracy stands as the fundamental pillar supporting effective quality assurance programs across industrial sectors. We position surface examination within the broader non-destructive testing framework, where materials undergo assessment without alteration.
This methodology delivers immediate results for real-time decision-making. It provides cost-effective evaluation while preserving product integrity throughout the testing process.
Ensuring Inspection Accuracy
Maintaining precision requires addressing multiple factors simultaneously. Comprehensive training programs develop defect recognition skills while establishing consistent interpretation standards.
We implement standardized protocols and detailed checklists to reduce procedural variability. Regular quality audits verify effectiveness through periodic re-examination of previously assessed items.
| Accuracy Factor | Common Challenges | Improvement Strategy | Quality Outcome |
|---|---|---|---|
| Human Performance | Fatigue, subjectivity, attention lapses | Task rotation, regular breaks, digital tools | Consistent defect identification |
| Environmental Conditions | Poor lighting, surface contamination | Adequate preparation, optimized lighting | Clear defect visibility |
| Equipment Limitations | Surface-only detection, line-of-sight requirements | Complementary NDT methods, remote technologies | Comprehensive assessment |
| Data Interpretation | Subjective analysis, inconsistent standards | Certification programs, automated systems | Reliable quality control |
Safety considerations operate in two critical directions. Examination identifies safety-critical defects like structural cracks before failures occur. Simultaneously, remote technologies protect personnel from hazardous environments.
We maximize reliability by combining human expertise with technological support. This integrated approach addresses inherent limitations while supporting continuous improvement initiatives.
Industry Applications and Use Cases
Industry-specific applications demonstrate how visual examination techniques adapt to meet sector-specific challenges and standards. We observe these methods delivering critical value across diverse operational environments.
Manufacturing, Healthcare, and Infrastructure
Manufacturing represents the most intensive user of quality verification processes. Automotive manufacturers conduct hundreds of checks during vehicle assembly. They verify fit, finish, and proper component installation.
Healthcare applications demonstrate life-critical importance. Medical device manufacturing requires meticulous examination of surgical instruments. Pre-surgical equipment protocols confirm sterilization effectiveness.
Infrastructure examination represents a massive ongoing challenge. Bridge and road assessments identify structural deterioration. These inspections directly inform maintenance prioritization and public safety decisions.
Real-World Examples and Benefits
Pharmaceutical companies inspect products for contamination and proper labeling. This ensures patient safety through rigorous quality standards. Electronic manufacturers examine circuit boards for soldering defects.
Energy sector operations rely on equipment reliability assessments. Pipeline corrosion detection prevents environmental incidents. Wind turbine blade examination identifies structural cracks before failure.
Each industry develops specialized protocols tailored to specific requirements. These approaches combine human expertise with technological support. The result is comprehensive quality assurance across all sectors.
Implementing Visual Inspection in Your Operations
Effective integration of quality verification processes begins with thorough organizational assessment and planning. We approach implementation as a strategic initiative that transforms operational capabilities while delivering measurable returns.
Best Practices for Deployment
Successful deployment requires systematic identification of all equipment, materials, and infrastructure requiring examination. We establish clear defect classification criteria and appropriate inspection frequencies.
Investment in comprehensive training programs develops essential competencies for personnel. Certification to industry standards ensures consistent application of examination protocols across your organization.
| Implementation Aspect | Manual Approach | Technology-Enhanced | Key Advantage |
|---|---|---|---|
| Data Collection | Paper-based forms | Digital documentation | Real-time analytics |
| Reporting Efficiency | Manual data entry | Automated workflows | Faster response times |
| Quality Consistency | Variable by inspector | Standardized criteria | Uniform standards |
| Maintenance Integration | Separate processes | Seamless connection | Proactive maintenance |
Integration with existing maintenance management systems amplifies program value. This creates a closed-loop process where findings automatically trigger corrective actions.
Contact Us Today
We invite you to explore how Opsio Cloud can transform your quality assurance programs. Our cloud-based solutions integrate examination processes with comprehensive management systems.
Contact us at https://opsiocloud.com/contact-us/ to schedule your consultation. Let us help you achieve higher quality standards and operational excellence through tailored implementation strategies.
Conclusion
As we conclude our exploration of surface assessment techniques, the strategic importance of integrating traditional expertise with modern innovation becomes clear. The evolution from basic manual examination to sophisticated automated systems represents a fundamental shift in quality assurance across all industries.
Today’s comprehensive process combines human insight with advanced technology, enabling unprecedented accuracy in defect detection. These enhanced methods protect worker safety while ensuring product integrity and reliable maintenance protocols.
We invite you to leverage these transformative techniques within your operations. Contact us at https://opsiocloud.com/contact-us/ to discover how our cloud-based solutions can optimize your quality control programs and drive operational excellence.
FAQ
What are the primary advantages of using automated visual inspections over manual methods?
Automated systems deliver superior speed, consistency, and accuracy. They eliminate human fatigue and subjectivity, enabling 24/7 operation and capturing minute defects that the naked eye might miss. This leads to higher quality control standards, reduced operational costs, and enhanced safety across production lines.
How do modern tools like cameras and sensors improve defect detection?
Advanced cameras, drones, and sensors capture high-resolution images and data from difficult-to-access areas. Sophisticated software then analyzes this information against predefined standards, identifying surface issues, material inconsistencies, and component flaws with exceptional precision. This technology transforms raw visual data into actionable insights for maintenance and quality assurance.
In which industries is visual inspection technology most critical?
This technology is vital in manufacturing for checking products and components, in infrastructure for assessing structural integrity, and in healthcare for diagnostic imaging. Industries like aerospace, automotive, and pharmaceuticals rely on these processes to ensure strict adherence to safety and quality standards, preventing costly failures.
What is the role of training and standards in maintaining inspection accuracy?
Effective training ensures that inspectors and technicians correctly operate equipment and interpret data. Adherence to industry standards guarantees that inspections are repeatable and reliable. This combination of skilled personnel and rigorous protocols is fundamental to achieving consistent, high-quality results and maintaining robust quality control systems.
Can visual inspection be considered a form of non-destructive testing?
Absolutely. Visual inspection is a cornerstone of non-destructive testing (NDT). It allows us to evaluate materials, components, and systems without causing damage. This makes it an essential, cost-effective method for assessing product integrity, planning maintenance, and ensuring operational safety throughout an asset’s lifecycle.

