In today’s manufacturing environment, the right visual inspection equipment can be the difference between consistent quality and costly defects. Whether you’re upgrading existing systems or implementing automated inspection for the first time, selecting equipment that aligns with your specific needs is crucial for success. This comprehensive guide will walk you through the key considerations, technology options, and implementation strategies to help you make an informed decision.
Why Visual Inspection Equipment Matters
Automated visual inspection has evolved from a luxury to a manufacturing necessity. Modern production lines demand consistent quality control that human inspectors simply cannot maintain at scale. The right inspection system delivers immediate benefits through defect reduction, increased throughput, and comprehensive traceability.
Key Benefits of Automated Visual Inspection
- Consistent quality control independent of operator fatigue
- Detection of defects invisible to the human eye
- Increased throughput with inspection at machine speed
- Comprehensive data collection for process improvement
- Reduced labor costs and reallocation of skilled workers
- Enhanced traceability and compliance documentation
According to industry research, manufacturers implementing advanced visual inspection systems typically see defect rates decrease by 20-40% while simultaneously increasing production speeds.
Not Sure Where to Start?
Our experts can help you identify the right inspection solution for your specific manufacturing challenges.
Request Expert Consultation
Visual Inspection Technology Comparison
The visual inspection equipment market offers diverse technologies, each with specific strengths. Understanding these differences is essential for selecting a system that addresses your particular inspection challenges.
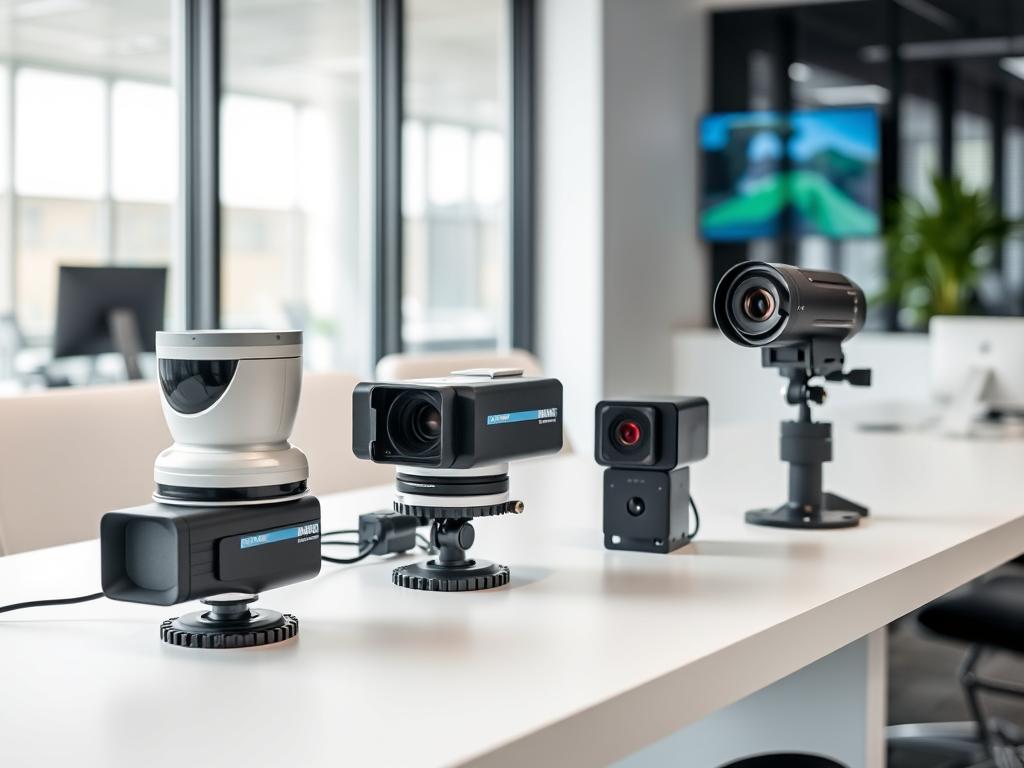
Camera Types and Applications
Area Scan Cameras
Capture complete images of stationary objects in a single frame. Ideal for discrete part inspection where objects can be momentarily stopped or precisely triggered.
- PCB component verification
- Assembly verification
- Label inspection
- Packaging integrity
Line Scan Cameras
Capture one line of pixels at a time, building images of continuously moving objects. Perfect for web materials and cylindrical surfaces.
- Continuous material inspection
- Film, paper, and textile inspection
- Cylindrical part surface inspection
- High-speed conveyor applications
Smart Cameras
All-in-one units with integrated processing, ideal for simpler applications where space is limited or deployment must be simplified.
- Presence/absence verification
- Simple measurement tasks
- Code reading and verification
- Color verification
2D vs. 3D Inspection Technologies
2D Vision Systems
Traditional 2D systems use cameras to capture flat images, analyzing features like color, contrast, and patterns. These systems excel at:
- Surface defect detection
- Label verification and OCR
- Pattern matching
- Color analysis
- Barcode and 2D code reading
2D systems are typically more cost-effective and easier to implement for applications where height or depth measurement isn’t critical.
3D Vision Systems
3D systems use techniques like laser triangulation, structured light, or stereo vision to create depth maps. These systems are essential for:
- Height and volume measurement
- Gap and flush analysis
- Surface contour inspection
- Assembly verification in 3D space
- Robot guidance for bin picking
While typically more complex and expensive, 3D systems provide critical data for applications where surface geometry is key to quality.
Key Selection Criteria for Visual Inspection Equipment
Successful implementation begins with clearly defined requirements. Before evaluating specific products, establish concrete performance criteria and integration needs.
Performance Metrics
| Metric |
Description |
Example Requirement |
| Resolution |
Smallest detectable feature size |
Must detect defects ≥ 0.1mm |
| Speed |
Parts inspected per minute |
≥ 120 parts per minute |
| Accuracy |
Measurement precision |
±0.05mm at 3σ |
| False Reject Rate |
Good parts incorrectly rejected |
≤ 0.5% |
| False Accept Rate |
Bad parts incorrectly accepted |
≤ 0.1% |
| Latency |
Time from image to decision |
≤ 100ms |
Integration Requirements
Beyond raw performance, consider how the inspection system will integrate with your existing production environment:
- Communication protocols: EtherNet/IP, PROFINET, Modbus, or digital I/O compatibility
- Data management: MES/ERP connectivity, database logging, image storage
- Physical constraints: Available mounting space, environmental conditions (temperature, dust, vibration)
- Operator interface: HMI requirements, exception handling workflows
- Maintenance access: Ease of cleaning, calibration, and component replacement
Need Help Defining Your Requirements?
Our inspection specialists can help you establish clear performance criteria based on your specific application needs.
Schedule Requirements Workshop
Software Approaches for Visual Inspection
The software driving your inspection system is as critical as the hardware. Different inspection challenges require different algorithmic approaches.
Rule-Based vs. AI-Powered Inspection
Rule-Based Algorithms
- Deterministic and explainable results
- Faster setup for well-defined defects
- No training data required
- Consistent performance
- Lower computational requirements
AI/ML-Powered Inspection
- Handles complex, variable defects
- Improves over time with more data
- Better with subtle pattern recognition
- Adapts to production variations
- Reduces false rejects for complex parts
Many modern systems employ hybrid approaches, using rule-based algorithms for well-defined checks and AI for more complex pattern recognition. This combination leverages the strengths of both methodologies while mitigating their weaknesses.
Key Software Considerations
- Ease of configuration: Can production staff make adjustments without programming?
- Flexibility: Support for multiple inspection types within one interface
- Scalability: License model and deployment across multiple lines
- Data management: Image storage, retrieval, and analysis capabilities
- Security: Update policies, network isolation options, user access controls
Implementation and Deployment Considerations
Successful visual inspection implementation requires careful planning beyond the equipment selection itself. Consider these practical aspects to ensure smooth deployment and operation.
Installation and Calibration
Proper installation and calibration are critical for inspection accuracy:
- Plan for stable mounting that minimizes vibration
- Ensure consistent, controlled lighting conditions
- Develop calibration procedures and schedules
- Create documentation for maintenance staff
- Consider environmental factors (temperature, dust, humidity)
Training and Support
Staff readiness significantly impacts implementation success:
- Operator training for daily use and exception handling
- Maintenance training for troubleshooting and calibration
- Engineering training for program adjustments
- Vendor support expectations and SLAs
- Documentation and knowledge transfer
ROI Analysis for Visual Inspection Equipment
Justifying investment in visual inspection equipment requires a clear understanding of both costs and benefits. A structured ROI analysis helps build a compelling business case.
Cost Components
Initial Investment
- Hardware (cameras, lighting, controllers)
- Software licenses
- Integration services
- Installation and commissioning
- Training and documentation
Ongoing Costs
- Maintenance and calibration
- Software updates and support
- Spare parts inventory
- Energy consumption
- Staff time for operation
Benefit Categories
- Reduced scrap and rework: Catching defects earlier in the process
- Increased throughput: Faster inspection than manual methods
- Labor reallocation: Moving skilled staff to higher-value tasks
- Quality improvement: More consistent inspection standards
- Reduced customer returns: Fewer defects reaching customers
- Enhanced traceability: Better documentation for compliance
Sample ROI Calculation
| Factor |
Value |
Notes |
| Annual production value |
$5,000,000 |
Total value of manufactured goods |
| Current defect rate |
2.0% |
$100,000 annual loss |
| Target defect rate |
1.2% |
$60,000 annual loss |
| Annual savings |
$40,000 |
From defect reduction alone |
| System cost |
$90,000 |
Hardware, software, integration |
| Annual maintenance |
$6,000 |
Support, updates, calibration |
| Payback period |
2.4 years |
Based on defect reduction only |
This example focuses solely on defect reduction. Additional benefits from increased throughput, labor savings, and customer satisfaction typically accelerate ROI significantly.
Want a Customized ROI Analysis?
Our team can help you build a detailed ROI model specific to your production environment and quality challenges.
Request ROI Assessment
Step-by-Step Selection Process
Follow this structured approach to select the optimal visual inspection equipment for your specific needs.

- Define inspection requirementsDocument specific defects to detect, measurement needs, and production constraints (speed, environment).
- Establish performance criteriaSet quantifiable metrics for resolution, speed, accuracy, and reliability.
- Map integration needsIdentify connections to existing systems, data management requirements, and physical constraints.
- Research technology optionsEvaluate camera types, lighting options, and software approaches that meet your criteria.
- Request vendor proposalsProvide detailed requirements to 3-5 qualified vendors and request specific solutions.
- Conduct proof-of-concept testingTest shortlisted systems with your actual parts under realistic conditions.
- Perform ROI analysisCalculate expected returns based on defect reduction, throughput improvement, and labor savings.
- Develop implementation planCreate a detailed roadmap for installation, training, and validation.
- Finalize vendor selectionChoose the solution that best balances performance, cost, and support.
Vendor Evaluation Checklist
- Industry experience: Proven track record in your specific application
- Reference customers: Similar installations you can contact or visit
- Support infrastructure: Local presence, response times, spare parts availability
- Training capabilities: Formal programs for operators, maintenance, and engineers
- Financial stability: Ensures long-term support and development
- Technology roadmap: Future development plans and upgrade paths
Visual Inspection Applications Across Industries
Visual inspection equipment serves diverse needs across manufacturing sectors. Understanding industry-specific applications helps identify relevant technologies and approaches.
Electronics Manufacturing
- PCB solder joint inspection
- Component placement verification
- Surface mount technology (SMT) quality
- Wire bonding inspection
- Display pixel defect detection
Automotive Production
- Paint finish analysis
- Gap and flush measurement
- Assembly verification
- Weld seam inspection
- Interior component quality
Food & Beverage
- Foreign object detection
- Label verification
- Fill level inspection
- Seal integrity checking
- Date code verification
Pharmaceutical
- Tablet integrity inspection
- Blister pack verification
- Label and serialization checking
- Particulate detection
- Cap and seal verification
Packaging
- Package completeness
- Barcode and QR code reading
- Print quality inspection
- Seal integrity
- Package dimension verification
Medical Device
- Surface finish inspection
- Assembly verification
- Dimensional measurement
- Packaging integrity
- Sterilization indicator verification
Future Trends in Visual Inspection Technology
The visual inspection equipment landscape continues to evolve rapidly. Understanding emerging trends helps ensure your investment remains relevant as technology advances.
Emerging Technologies
- AI and deep learning: Increasingly sophisticated defect detection with less programming
- Hyperspectral imaging: Detecting material properties beyond visible light
- Edge computing: More processing at the inspection point for faster decisions
- Cloud integration: Cross-plant analytics and model improvement
- Collaborative robots: Integration of vision with flexible automation
- Augmented reality: Enhanced operator interfaces for exception handling
When selecting equipment, consider vendors with clear technology roadmaps and upgrade paths that will accommodate these emerging capabilities without requiring complete system replacement.
Making Your Visual Inspection Equipment Decision
Selecting the right visual inspection equipment requires balancing technical performance, integration needs, and economic considerations. By following a structured approach and focusing on your specific requirements, you can implement a system that delivers meaningful quality improvements and strong return on investment.
Key Takeaways
- Define clear, measurable inspection requirements before evaluating technologies
- Consider the full system lifecycle, including maintenance and upgrades
- Test prospective systems with your actual parts under realistic conditions
- Calculate ROI based on multiple benefit categories, not just defect reduction
- Select vendors based on both technical capability and long-term support
Ready to Transform Your Quality Control?
Our visual inspection experts can guide you through the selection process and help you implement a solution tailored to your specific manufacturing challenges.
Contact Our Inspection Specialists
Frequently Asked Questions
How long does it typically take to implement a visual inspection system?
Implementation timelines vary based on complexity, but typically range from 4-12 weeks. Simple smart camera deployments may be completed in as little as 2-4 weeks, while complex multi-camera systems with custom integration can take 3-6 months from order to full validation.
Can visual inspection systems be retrofitted to existing production lines?
Yes, most visual inspection equipment can be retrofitted to existing lines. The key considerations are available mounting space, lighting control, and integration with existing control systems. Retrofits may require temporary production interruptions for installation and validation.
How do I determine the right resolution for my application?
The required resolution depends on the smallest feature you need to detect. As a rule of thumb, you need at least 3-5 pixels across the smallest defect for reliable detection. Working backward from this requirement and your field of view, you can calculate the necessary camera resolution.
What’s the difference between machine vision and computer vision?
Machine vision typically refers to industrial systems designed specifically for manufacturing inspection and control, with emphasis on reliability and real-time performance. Computer vision is a broader field encompassing all applications of visual data processing, including consumer, medical, and research applications.
