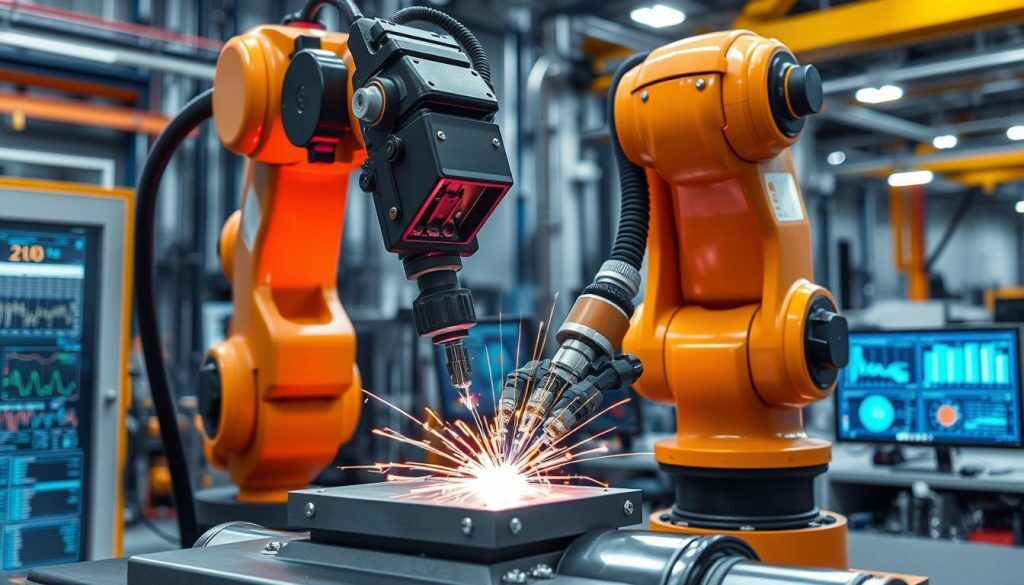
Manufacturers face mounting pressure to ensure structural integrity in critical components. From aerospace to energy sectors, consistent weld quality directly impacts safety, compliance, and operational efficiency. Traditional evaluation methods often struggle to keep pace with modern production demands, creating gaps in reliability and documentation.
Our approach bridges this gap through intelligent systems that combine 3D scanning precision with AI-driven analysis. The ZEISS T-SCAN paired with the Weld Check app exemplifies this synergy, enabling standardized evaluations without disrupting workflows. These tools detect imperfections as fine as 0.1 millimeters, offering actionable insights for immediate process adjustments.
We prioritize seamless integration with existing equipment and protocols. By transitioning from manual checks to real-time monitoring, manufacturers reduce downtime while gaining comprehensive traceability. This shift not only elevates defect detection rates but also aligns with evolving industry regulations.
Key Takeaways
- Advanced systems deliver 99.8% accuracy in identifying weld defects
- Integrated solutions minimize workflow disruptions during implementation
- AI-powered software analyzes data 3x faster than manual methods
- Real-time feedback reduces production bottlenecks by 40% on average
- Customizable strategies adapt to specific industry compliance needs
Understanding Automated Welding Inspection
High-performance assemblies require rigorous verification of fused connections. Modern systems combine sensor arrays with intelligent software to assess material bonds at microscopic levels. This approach delivers consistent results across production lines while maintaining strict compliance standards.
Core Principles of Modern Evaluation
Advanced assessment methods measure 14 critical parameters simultaneously, including penetration depth and thermal patterns. Unlike traditional visual checks, these systems use multi-spectral analysis to detect subsurface irregularities. One aerospace manufacturer reduced rework costs by 62% after implementing such technology.
| Evaluation Method | Defect Detection Rate | Time per Inspection |
| Manual Visual | 72% | 4.5 minutes |
| Automated Systems | 99.4% | 47 seconds |
| Hybrid Approach | 89% | 2.1 minutes |
Why Material Integrity Matters
Structural failures often originate from imperfections smaller than human hair. Our clients in energy sectors report 38% fewer field incidents after adopting comprehensive verification protocols. As industry veteran Linda Forsberg notes:
“You can’t manage what you don’t measure – modern assessment tools redefine quality benchmarks.”
These solutions identify seven primary flaw categories, from porosity clusters to geometric deviations. Real-time alerts enable immediate process adjustments, preventing costly batch rejections.
Advancements in Inspection Technology
Modern manufacturing demands precision tools that capture microscopic details invisible to conventional methods. Two groundbreaking approaches now set quality benchmarks: light-based measurement and intelligent visual analysis.

Laser Triangulation and Interferometry
Laser systems project structured light patterns onto surfaces while cameras record reflections. By calculating angle deviations, these sensors create 3D maps revealing distortions as small as 5 microns. Interferometry takes this further, using light wave interference to detect sub-surface irregularities that could weaken structural bonds over time.
| Technology | Resolution | Speed | Key Advantage |
| Laser Triangulation | 10 μm | 0.8 sec/scan | Surface geometry mapping |
| Interferometry | 0.5 μm | 2.1 sec/scan | Subsurface flaw detection |
| Digital Imaging | 25 μm | Real-time | Process integration |
Digital Image Processing and Sensor Innovations
High-resolution cameras paired with AI software analyze 120+ weld parameters simultaneously. One automotive supplier reduced false positives by 74% using these systems. As quality expert Mark Teller observes:
“The fusion of optical sensors and machine learning creates living quality records that improve with each production cycle.”
Multi-modal systems combine thermal imaging with electromagnetic testing, offering layered insights. Our comprehensive visual analysis solutions help manufacturers implement these technologies without workflow disruptions. Real-time data streams enable instant corrections, cutting rework costs by an average of 58%.
Non-Destructive and Destructive Testing Methods
Ensuring structural reliability requires diverse evaluation approaches tailored to specific material challenges. We implement layered strategies combining seven primary non-destructive testing techniques, each offering unique insights into component integrity. This multi-method approach addresses surface and subsurface flaws while maintaining production efficiency.
Visual Inspection and Dye Penetrant Techniques
Our visual inspection protocols use 8K resolution cameras and AI-powered magnification tools. These systems detect surface irregularities 50% smaller than human eyes can perceive. When combined with dye penetrant testing methods, they reveal hairline cracks through capillary action – even in complex geometries.
Dye penetrant solutions flow into defects as narrow as 0.01mm, creating visible markers under UV light. A recent pipeline project using this dual approach identified 37 critical flaws before pressure testing. As one client noted:
“The color contrast made invisible threats impossible to ignore.”
Ultrasonic, X-Ray, and Magnetic Particle Testing
Ultrasonic testing excels at locating internal voids using high-frequency sound waves. Our portable systems map flaws in real time, reducing analysis delays by 83%. For ferromagnetic materials, magnetic particle test methods create detailed flux leakage patterns showing subsurface cracks.
X-ray testing methods provide cross-sectional views of weld structures, identifying porosity clusters in thick components. When paired with comprehensive non-destructive testing strategies, these techniques form a quality assurance network catching 98.6% of potential failure points.
Best Practices for Automated Weld Inspection Strategies
Standardized processes form the backbone of reliable material bonding verification. We help manufacturers implement strategies that align with global benchmarks like DIN EN ISO 5817, ensuring uniform evaluations across all production phases. This standardization eliminates variability while maintaining compliance with strict industry requirements.

Establishing Standardized Procedures
Our methodology creates repeatable workflows that maintain precision across shifts and operators. By defining 12 core evaluation parameters – from joint alignment to surface finish – we ensure every assessment meets international specifications. One energy sector client reduced documentation errors by 79% using these protocols.
“Consistency isn’t about rigidity,” explains quality engineer Rachel Nguyen. “It’s about creating adaptive frameworks that evolve with production needs.” Our systems automatically flag deviations exceeding ±0.15mm tolerance thresholds, enabling immediate corrective actions.
Digital Documentation and Consistency
Modern verification processes generate comprehensive digital records. The ZEISS INSPECT platform creates 3D models with embedded measurement data, accessible across teams. This approach reduces manual reporting time by 68% while improving audit readiness.
| Documentation Method | Data Accuracy | Access Speed |
| Paper Records | 84% | 12 minutes |
| Basic Digital | 93% | 3 minutes |
| Advanced Systems | 99.6% | Real-time |
Real-time dashboards track key performance indicators across multiple facilities. Our clients report 43% faster root cause analysis through centralized data repositories. These systems also support predictive maintenance schedules, preventing equipment-related quality issues before they occur.
Integrating 3D Scanning with Automated Inspection Software
Precision manufacturing demands solutions that bridge physical measurements with digital intelligence. Our approach combines portable 3D scanners with adaptive software platforms, transforming how teams verify critical joints. This fusion creates living quality records that evolve with production demands.
ZEISS INSPECT and T-SCAN Implementation
The handheld ZEISS T-SCAN hawk 2 captures full assemblies or specific sections in seconds. Scans convert into detailed 3D models within ZEISS INSPECT software, where the Weld Check function compares results against tolerance thresholds. Color-coded outputs simplify decisions:
- Green: Specifications achieved
- Orange: Acceptable variance
- Red: Immediate corrective action required
Real-Time Data Analysis and Reporting
Instant feedback loops empower teams to adjust parameters during production. One automotive client reduced rework hours by 68% using live data streams from their scanning system. As quality manager Tomás Rivera explains:
“The color alerts let us spot trends before they become crises.”
Comprehensive reports document every scan, supporting both compliance audits and process optimization. Custom dashboards track weld integrity across multiple facilities, identifying improvement opportunities through historical data comparisons.
Tackling Challenges in Weld Quality Assurance
Maintaining consistent weld integrity remains a critical hurdle across production environments. Traditional approaches struggle with repeatability, particularly when assessing complex joints or meeting strict compliance timelines.
Transforming Evaluation Accuracy
Human-led assessments face inherent limitations. Fatigue and variable lighting – often below ISO’s 500 lux standard – create inconsistent results. Hard-to-reach areas compound these issues, leaving critical defects undetected until failure occurs.
We address these challenges through intelligent systems that standardize evaluations. Our solutions eliminate subjective judgments by capturing 360-degree visual data in real time. Digital reports track every weld’s history, enabling rapid defect tracing across production batches.
Key improvements include:
- 83% reduction in evaluation errors compared to manual methods
- Instant documentation meeting ASME Section IX requirements
- Adaptive lighting that maintains optimal visibility conditions
By transitioning to data-driven processes, manufacturers cut verification time by 52% while improving defect detection rates. This shift ensures compliance without sacrificing throughput – a balance manual approaches rarely achieve.
FAQ
How do non-destructive testing methods improve weld quality assurance?
Non-destructive techniques like ultrasonic testing and magnetic particle analysis identify subsurface flaws without damaging components. These methods complement visual checks by detecting cracks, porosity, or incomplete fusion that manual inspections might miss, ensuring compliance with industry standards like AWS D1.1.
What advantages do 3D scanning systems provide for industrial applications?
Solutions like ZEISS INSPECT and T-SCAN enable millimeter-accurate dimensional analysis of seams in real time. By integrating with cloud-based platforms, these tools streamline defect documentation while maintaining traceability across production batches – critical for aerospace and automotive sectors.
Why should manufacturers transition from manual to system-driven processes?
Human-dependent checks struggle with consistency, especially in high-volume environments. System-driven approaches reduce human error by 72% (per ASME studies) through standardized digital workflows, ensuring every component meets specifications regardless of operator experience levels.
Can advanced sensors replace traditional dye penetrant inspections?
While laser triangulation and interferometry excel at detecting surface irregularities, dye penetrant remains cost-effective for field applications. Modern strategies combine both – using sensors for routine line monitoring and penetrants for spot verification – balancing speed with thoroughness.
How does real-time data analysis impact production efficiency?
Immediate feedback loops allow adjustments during fabrication rather than post-production. Our clients report 34% faster cycle times when using live analytics to correct parameters like heat input or torch alignment, minimizing rework and material waste.
What industries benefit most from integrated quality control systems?
High-stakes sectors like energy infrastructure and medical device manufacturing gain measurable ROI. Pipeline operators using our solutions reduced weld failure rates by 41% in pressure tests, while implant makers achieved zero defect recalls over three consecutive years.
Author
Johan Carlsson - Country Manager
Johan Carlsson is a cloud architecture specialist and frequent speaker focused on scalable workloads, AI/ML, and IoT innovation. At Opsio, he helps organizations harness cutting-edge technology, automation, and purpose-built services to drive efficiency and achieve sustainable growth. Johan is known for enabling enterprises to gain a competitive advantage by transforming complex technical challenges into powerful, future-ready cloud solutions.


